
Distributing your survey by email
This class looks at SmartSurvey’s email tool and how you can use to build contact lists, send surveys, and automate reminders to improve engagement.
Class 5: Contact Lists and Invitations
So far we’ve concentrated on the survey itself, but one of the most powerful and widely-used features is the email tool. This works with the contact lists that you can add to the address book. These allow you to enter details you’ve already collected about your respondents and associate those details with their survey responses.
Basic Contacts
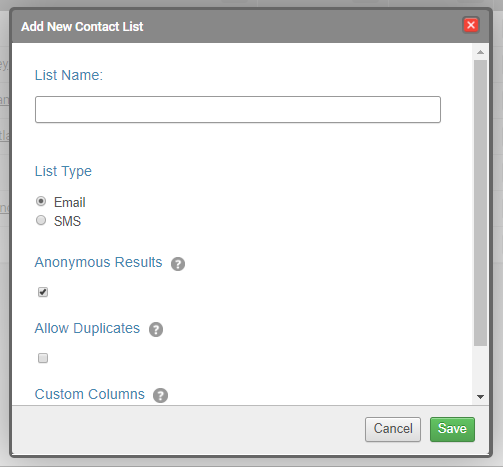
In its simplest form, a SmartSurvey contact list can be just a list of email addresses (or phone numbers, if you have access to our SMS Surveys feature). Once you’ve uploaded this data to SmartSurvey you can use the Email tool to send messages to the contacts inviting them to take part in a particular survey. It’s important to ensure that you have a valid legal basis for doing this, such as the respondent’s consent.
You can then follow this up with reminders to those members of the list who have not yet completed the survey. In addition you can add the respondent’s name as additional data. Doing this can have a small positive effect on response and completion rates as, by making use of piping (Which we’ll discuss in a later masterclass), you can insert this into the survey and invitation messages making things a little more personal.
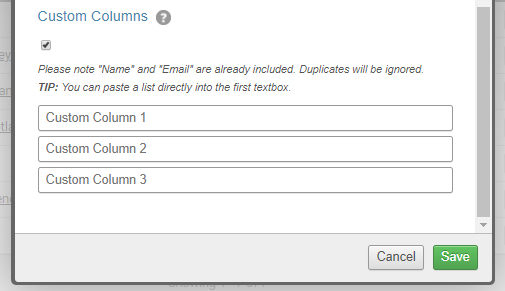
Custom Columns
If you have more information about your respondents, you can add this to the contact list as well by creating custom columns. Each contact list can have several extra columns added to it to contain additional information about the respondents. The information that gets added to these columns can be simple viewed alongside the response data in the results tab, included in exports, or used in piping.
Sending the Invitations
Once you have your contact list set, and a survey, then creating an email invitation is very simple.
You can access the email tool from either the contact list or the survey itself. Then, create and send a default invitation message in a few clicks. You can spend more time to create a fully customised and branded message if that’s your preference. You can find more instructions on how to do this on the knowledgebase.

It’s always a good idea to test your messages before you send them out to your list. Once you’re happy with your invitation content (and the survey itself, of course), you can schedule a time for the invitation to go out, or set it to send immediately.
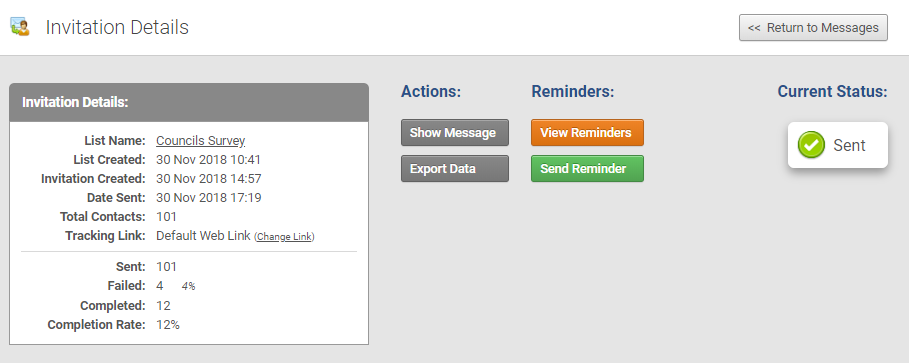
If you do choose an immediate send, what this will actually do is queue it up so it sends 5 minutes from when the button is clicked. This gives you a small amount of breathing space just in case you have a last-minute change of mind. We’ve all been there. After sending, you’ll be able to see a report in the email tool showing which respondents have received the mail, opened it, or completed the survey.
Reminders
Once the invitation has been sent, you can set up any reminders you want to go out. This is essentially identical to setting up the original invitation, with the difference being that the target group will be defined at the moment the invitation is sent – the system will look at the original contact list, determine who has not yet completed the survey, and send them a reminder. It’s possible to set up several reminders in a chain, with each one in the chain going out after each other.
Anonymity
It’s possible to use a contact list to distribute a survey where the data will be collected anonymously. In this case, the contact list’s data is not stored with the response data. Reminders will still work – whether a particular respondent has responded or not is stored, but this information is not available to the user.
Putting it to use
Now we know what the capabilities are, then let’s put it to use with an example from masterclass 2, when we discussed a feedback survey for a restaurant.
To recap, this survey was intended to follow-up a visit to a restaurant to determine if our customers were satisfied. We asked 5 questions:
- How satisfied were you overall with your visit?
- Was the food good?
- Was the service good?
- Was the place clean and pleasant?
- Any further comments?
And distributed it via printed links. Now, let’s propose that, when we take bookings, we collect an email address. We will also know the name of the customer and the date of the booking. We can add these to our contact list and send them a survey the following day (We should ensure that we get permission to do this when we take the booking). By adding this information to the contact list, we’ll now be able to match the survey responses with the day that the customer visited, making it easier to identify if there are any particular issues that could be related – staffing levels, menu variations, or the place being busier or quieter than usual.
Another example might be following up on a sale. By adding the reference or order number to the contact list, any feedback that’s collected can be linked back to that specific transaction, giving much better insight into where improvements should be made.
Moving on
The benefits of email distribution are pretty clear – a potential respondent accessing their email is very likely to be doing so on a device that can also access the internet and respond to the survey. There’s very little friction or effort required to get from invitation to survey. SMS has similar benefits, though also has a slightly better response rate, as people usually treat text message alerts with higher priority than email alerts. In our next article, we’re going to talk about some other ways of using data to improve the survey experience both for the respondent and researcher, so be sure to check back.

